Troubleshooting an Overheating Dryer
Experiencing an overheating dryer can be frustrating and dangerous. Excessive heat in a dryer can lead to fire hazards, damaged clothes, and breakdown of internal components. When a dryer starts getting too hot, it’s important to diagnose and resolve the issue promptly. This article explores the common reasons for dryer overheating and provides troubleshooting tips to cool down your appliance.
What Causes a Dryer to Overheat?
There are several root causes that can make a dryer overheat:
Blocked Ventilation
Proper ventilation is critical for controlling dryer temperature. Lint and debris accumulation in the vent hose or ductwork restricts airflow, preventing hot air from escaping from the dryer. As hot air recirculates back into the dryer, temperatures escalate beyond the desired level.
Warning signs: clothes taking longer than normal to dry, hot air blowing out from the vent, high surface temperature on the dryer exterior.
Faulty Thermostats
The thermostats regulate the amount of heat and shut off the heating elements when the desired temperature is reached. Defective thermostats can fail to sense temperature correctly and continue heating indefinitely. Gas dryer thermostats control the gas valve, and electric dryer thermostats turn heating coils on and off.
Warning signs: dryer feels hotter than normal, burns clothes on low settings.
Malfunctioning Thermal Fuse
The thermal fuse is a safety device designed to trip and shut off power when excess heat is detected. If the thermal fuse is faulty, it may not blow at the intended temperature threshold. This allows rapid overheating to occur.
Warning signs: dryer won’t start, burning smell from dryer.
Short Cycling
Short cycling refers to a dryer not running long enough to properly dry items. It usually happens when large loads are placed in the dryer, overwhelming its capacity. The wet laundry prevents the dryer from reaching the target temperature, prompting more frequent cycling of the heating elements in an effort to dry the clothes. This constant rapid reheating can spike temperatures.
Warning signs: clothes are still damp after a cycle, dryer repeatedly turns on and off.
Worn-Out Heating Element
Over time, heating coils and gas burner tubes can degrade and function less efficiently. This causes longer drying times, and the elements remain on trying to maintain heat. Eventually, temperatures will exceed safe limits.
Warning signs: clothes taking longer to dry, burning smell from dryer.
Gas Burner Problems
Defective gas valves, weak flame, and incorrect gas pressure can lead to poor combustion and increased heat. Insufficient airflow over the gas burner also contributes to overheating.
Warning signs: weak flame in viewport, burning smell from dryer.
Safety Precautions
When troubleshooting an overheating dryer, make sure to follow these safety guidelines:
- Unplug the dryer before inspecting or replacing any components.
- Allow the dryer to cool fully prior to working on it.
- Use caution handling heated parts like heating elements or housing.
- Have an ABC rated fire extinguisher on hand in case of emergency.
- Use personal protective equipment like work gloves and safety goggles.
- Avoid reaching into the dryer drum when the drive belt is engaged – it can turn unexpectedly.
- Verify electrical connections are tight and wires are undamaged before restoring power.
- Make sure everyone in the household knows to keep away from the dryer area during repairs.
- Consult a technician for gas valve adjustments or complex electrical issues.
DIY Troubleshooting Tips
Many overheating issues can be diagnosed and fixed at home with some basic tools and mechanical skills. Here are troubleshooting techniques to try:
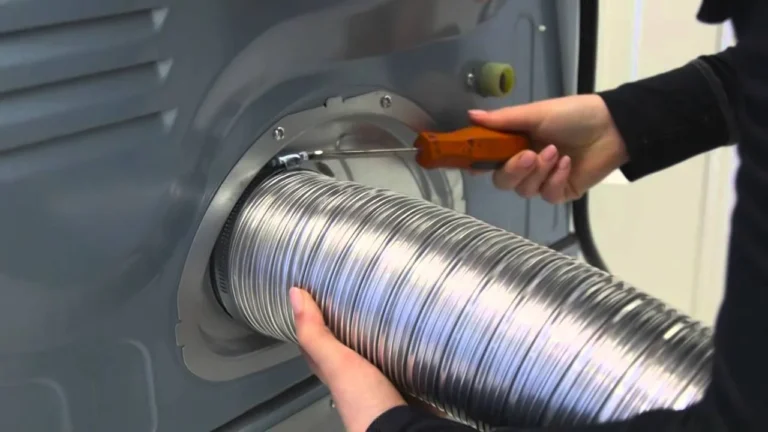
1. Check exhaust venting
- Disconnect the vent hose from rear of dryer and inspect for lint buildup. Clean out any visible lint.
- Examine vent hose carefully for kinks or crushing that restricts airflow. Try straightening out any damaged sections or replacing the vent hose if severely worn.
- Detach the vent duct from the dryer and outlet. Inspect inside with a flashlight for obstructions. Use a vacuum hose to clear any accumulated lint or debris from vent.
- Ensure vent duct is clear all the way outside. Verify exhaust hood flap opens freely.
- Reconnect vent to dryer and outlet, confirming tight fit. Support duct to prevent sagging and kinks.
- Run dryer empty and feel duct as it operates. You should feel a steady stream of warm air. Little to no air indicates further blockage.
2. Evaluate thermostats
Electric dryers have multiple thermostats while gas models generally have one. Refer to the service manual for your brand and model to identify thermostat locations.
- Unplug the dryer and open the cabinet to access thermostats. Mark wires for reassembly.
- Use a multimeter on the RX1 scale to check for continuity. Thermostats should show continuity at room temperature.
- Heat thermostats with a hair dryer and retest. Continuity should break open as they get hot.
- Replace any thermostats that fail these tests. Reinstall wiring carefully.
3. Test thermal fuse
The thermal fuse has two terminals on the housing.
- Check for continuity across the terminals using a multimeter. No continuity means the fuse is blown.
- If blown, check venting before replacing. The new fuse will blow again unless overheating cause is identified.
- Install identical replacement fuse with same temperature rating. Securely attach fuse terminals.
4. Diagnose heating elements
Electric dryers have two heating elements – one for the drum and one for the blower.
- Unplug dryer and remove panel to access heating elements. Detach wiring.
- Check wire terminal connections for burns or breaks. Tightened loose wires.
- Using a multimeter on the Ohms setting, check resistance across element terminals. Refer to service manual for correct specs.
- If resistance is way off or infinite, the element is likely blown. The element should visually appear burned or broken. Replace matching element.
5. Inspect gas valve solenoids
Gas dryers have a solenoid coil that controls gas flow to the burner.
- Unplug dryer and turn off gas supply.
- Disconnect gas line to the dryer gas valve. Check for debris clogged in inlet.
- Remove access panel to the gas valve coils. Check for signs of overheating.
- Use continuity test on multimeter to check solenoid coils. No continuity means defective solenoid.
- Ensure flame sensor is clean. Check igniter for cracks indicating element needs replacement.
6. Improve ventilation
If overheating persists after checking components, poor ventilation may still be the root cause.
- Increase vent hose diameter to 4 inches if undersized. Reduce vent run length.
- Use rigid smooth wall metal ductwork to maximize airflow.
- Eliminate duct elbows and ensure vent run is straight as possible.
- Clean lint from full interior exhaust system annually.
- Open window when running dryer to supplement ventilation. Check if overheating improves.
7. Use dryer properly
- Do not overload dryer – leave room for air circulation.
- Clean lint filter before every load. Wash filter monthly with soap and water. Consider upgrading to a dual filter system.
- Allow proper drying time and do not stop cycle prematurely.
- Maintain gap between dryer rear and wall so airflow isn’t restricted.
- Give the dryer periodic rests between loads. Don’t start new cycle immediately after previous ends.
- Avoid running dryer during hot humid days.
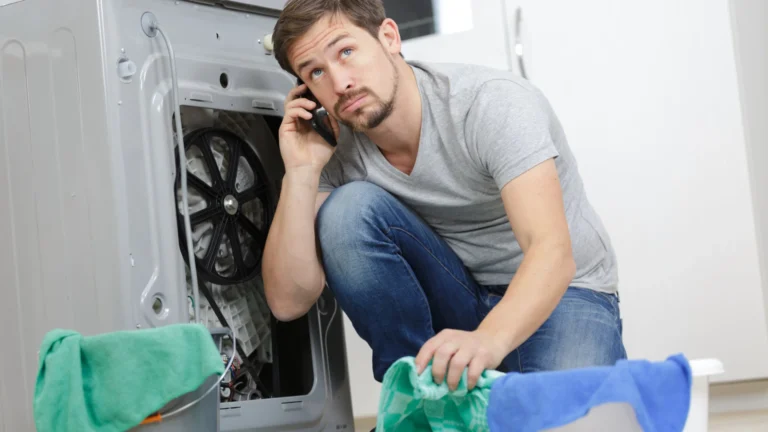
When to Call a Technician
If you have diligently tried the DIY troubleshooting steps without resolving the overheating, it’s a good idea to call in a professional service technician. They have specialized skills and tools to fully diagnose complex electrical or mechanical issues. Technicians can also access parts and perform repairs not feasible for a homeowner.
Be prepared to describe your make and model, the overheating symptoms, and any steps attempted. They will ask detailed questions to narrow down root cause.
Examples of when professional service is recommended:
- Electrical short detected – indicated by burning smell, smoke, melting components.
- Gas connections leaking – evidenced by strong gas odor. Shut off gas immediately.
- Drum won’t turn – motor, belt or idler pulley failure suspected.
- Strange noises from mechanical components.
- No error codes but dryer still gets excessively hot.
- Venting improvements did not resolve overheating.
- Repeated glowing red heating element failure.
- Scope of work is beyond DIY comfort level.
While a technician visit isn’t free, catching and correcting a serious issue can prevent a much more costly appliance replacement. For older dryers with overheating woes, it may make sense to start budgeting for a brand new energy efficient model.
Preventing Dryer Overheating
The best cure for overheating is preventing it in the first place through proper dryer maintenance:
- Clean lint filter before each load – Lint is the main cause of overheating. Changing filters removes built up lint.
- Wash lint filter monthly – Detergent helps dissolve accumulated residue missed by brushes.
- Check venting yearly – Inspect the full duct run from dryer to outlet for lint and verify flaps open properly.
- Avoid overloading – Jam packing impedes airflow so run smaller loads.
- Allow heat dissipation – Let dryer cool down between loads instead of back-to-back cycles.
- Don’t restrict airflow – Provide clearance behind the dryer and avoid crushing vent hoses.
- Level dryer properly – Improper leveling can impede drum rotation and cause excess friction heat.
- Upgrade with dual filters – If lint is a constant battle, dual filter systems provide extra protection.
- Clean dryer interior – Vacuum out inside cabinet, ducts, and below drum yearly to eliminate hidden lint debris.
When to Replace Your Dryer
If your dryer is older than 10 years and you’ve had repeated overheating issues, replacement may be the most cost-effective option. Advances in technology have made new dryers much more energy and temperature efficient.
Signs your dryer is due for retirement:
- Frequent overheating despite venting fixes.
- Constant burning smell even on low settings.
- Very long drying times – taking 2+ hours to fully dry a normal load.
- Clothes feel excessively hot.
- Unusual new noises from motor or drum.
- Rust spots visible inside drum.
- Heating elements keep burning out.
Look for replacement dryers that offer:
- Moisture sensors – Detect clothes dryness and automatically shuts off.
- Variable speed motors – Allows customized drying rates.
- Stainless steel drum – Resists corrosion for longer life.
- Quiet operation – Minimizes disruptive noise.
- Energy efficiency – Saves on electricity costs.
- Dual thermostats – Provide an extra layer of overheat protection.
Conclusion
An overheating dryer can be a fire risk and damage clothes as well as the appliance. Frequent overheating usually signals a maintenance issue like blocked venting or component failure. Following proper troubleshooting steps can help identify and resolve many overheating causes. Make sure to address any problems promptly before a minor issue turns into a dryer disaster. With vigilant preventative care, your dryer can continue providing reliable service for years to come.